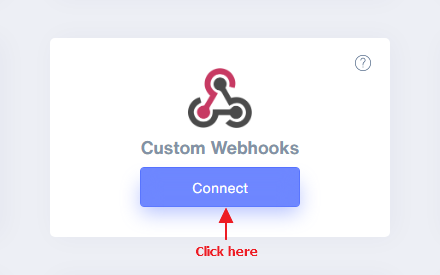
Step 1- Go to WiserNotify > Integration
Search for "Custom Webhooks"
Click on the Connect button.
Step 2
- Enter the connection name.
- Copy the webhook URL.
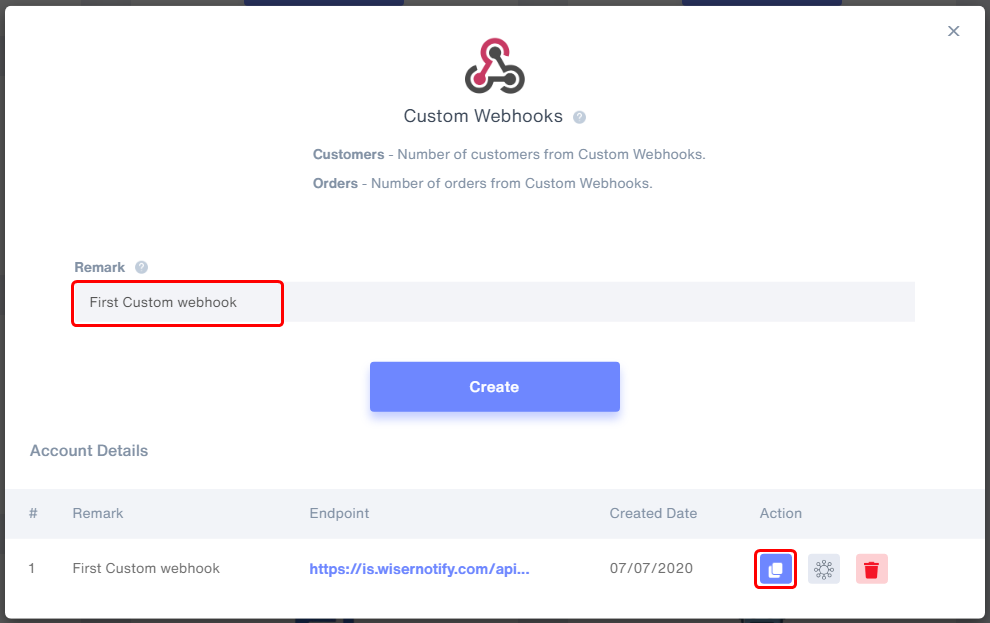
- Click on Mapping icon.

- Please keep this screen open
Step 3 - Here, We will set WiserNotify custom webhook URL in klaviyo account.
- Login in Your klaviyo account.
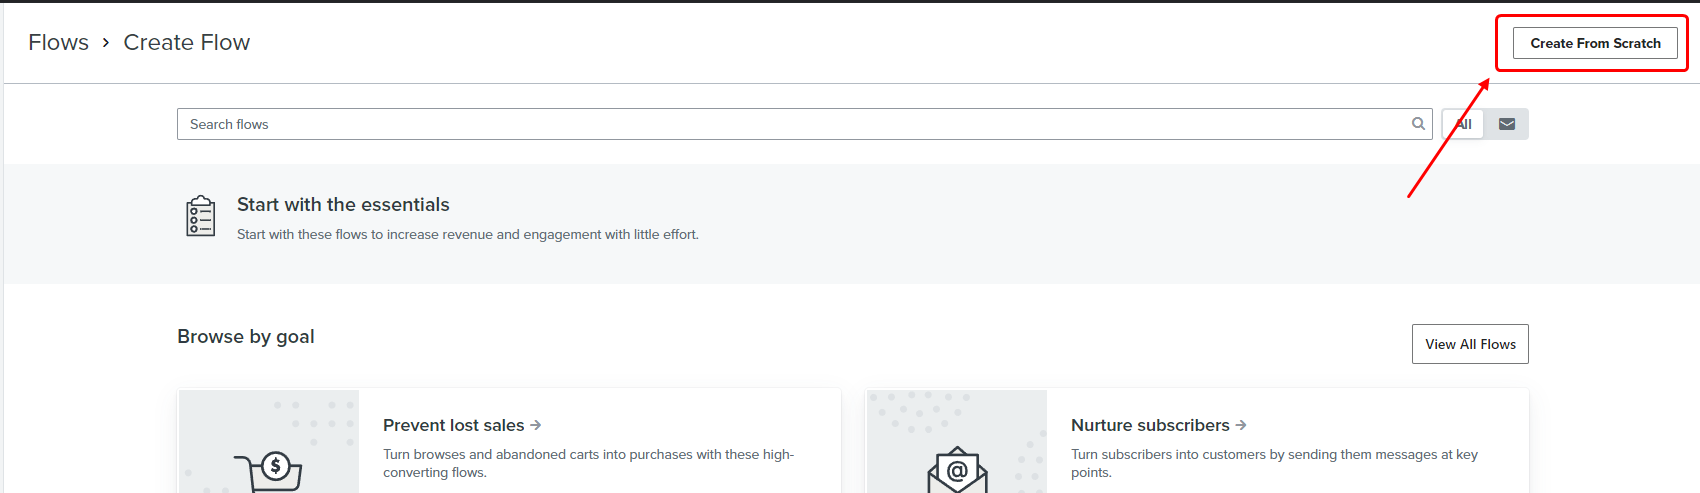
- Click on Flow > Create flow
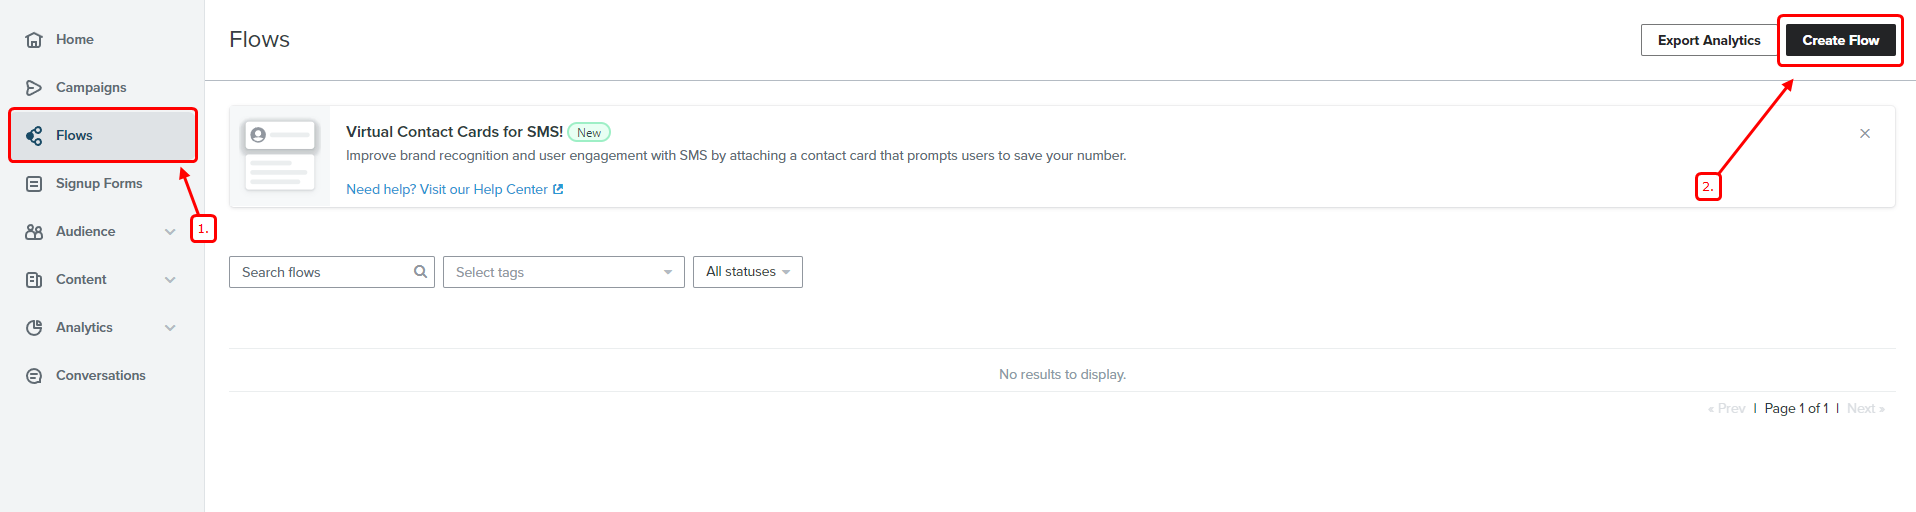
- Click on Create From Scratch
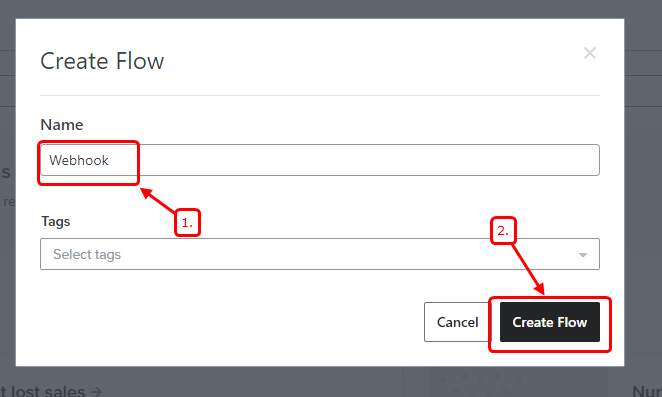
- Enter flow name ( You can enter anything that is suitable for you)
- Click on create flow
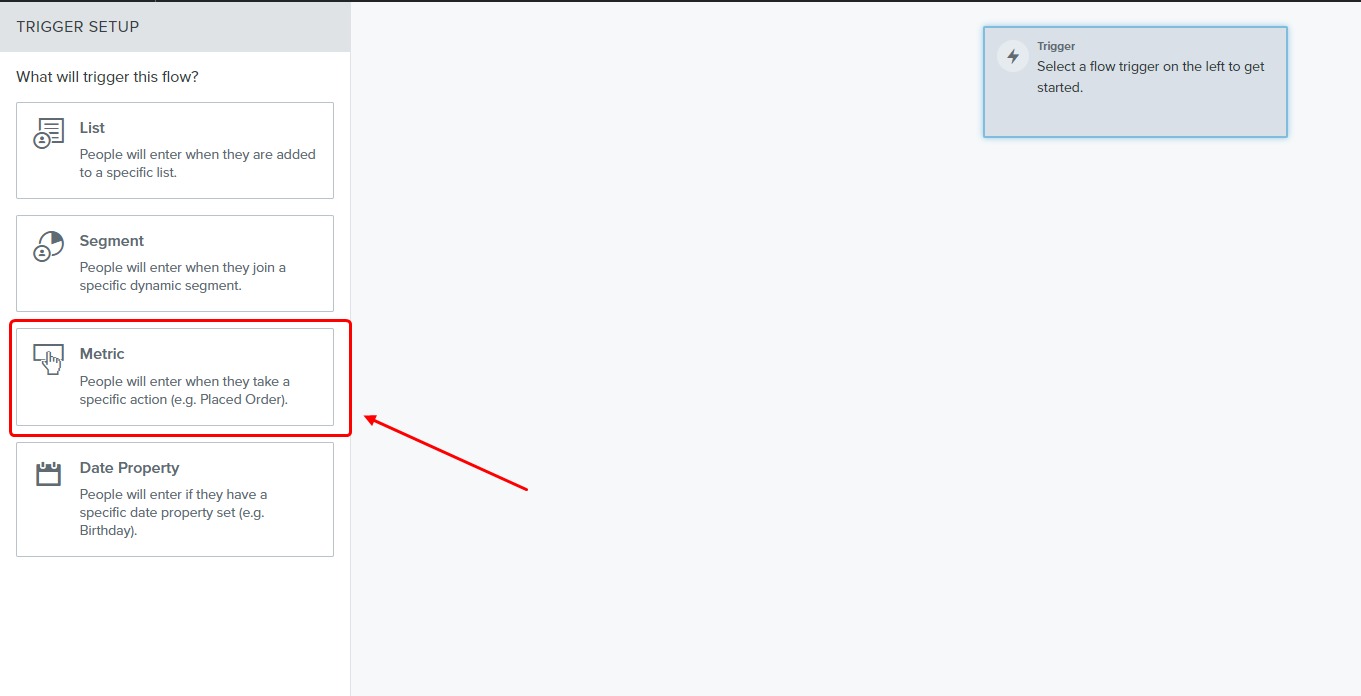
- Click on Metric
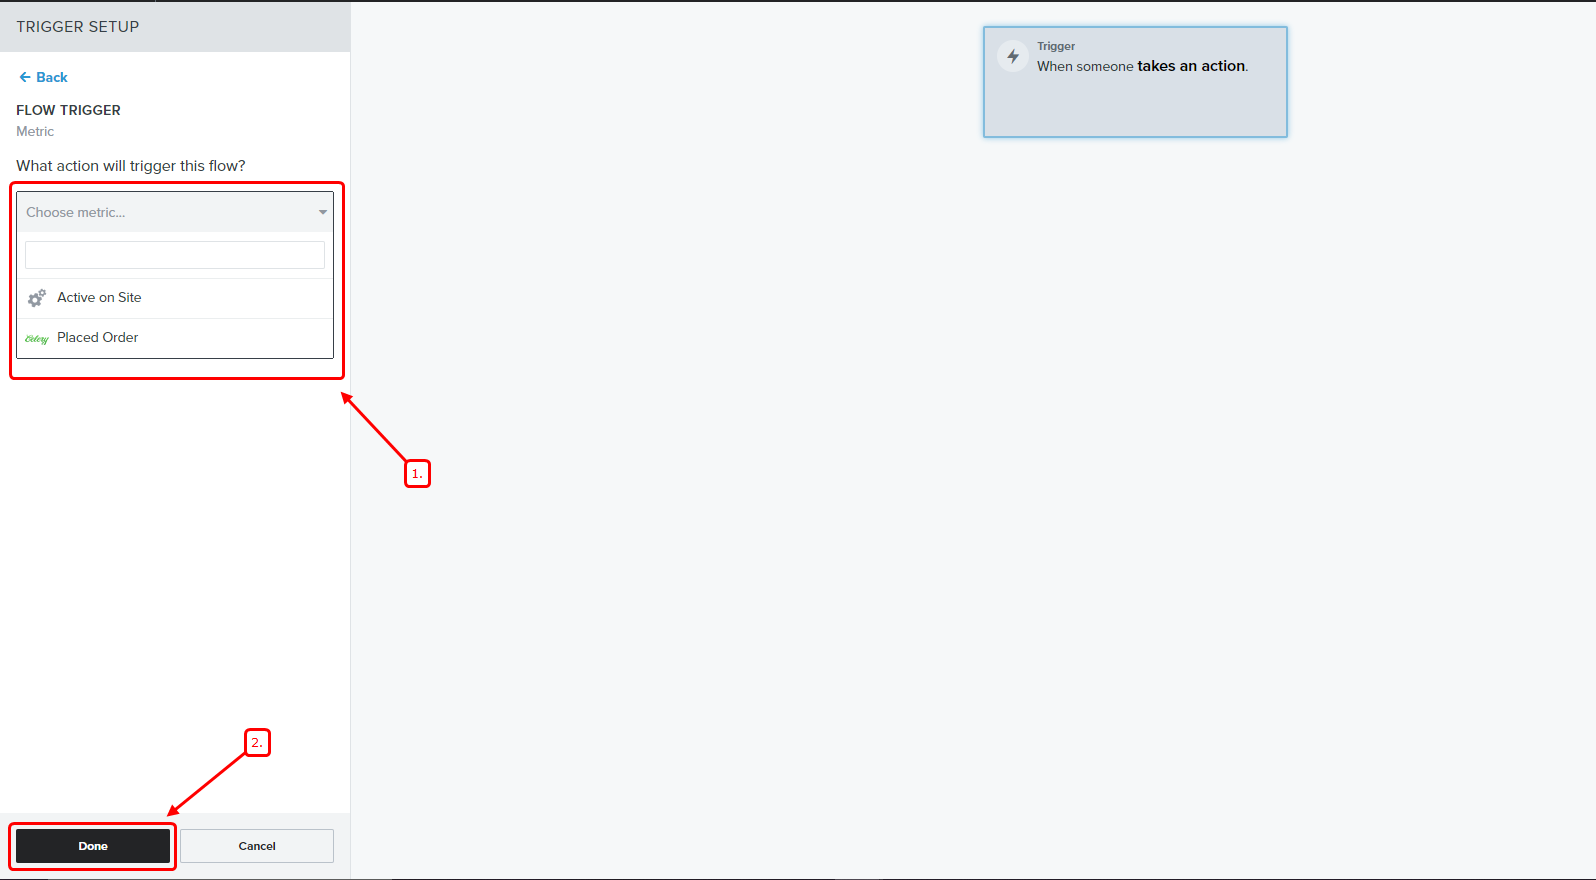
- Select metrics you want for sending webhook data
- Click on done
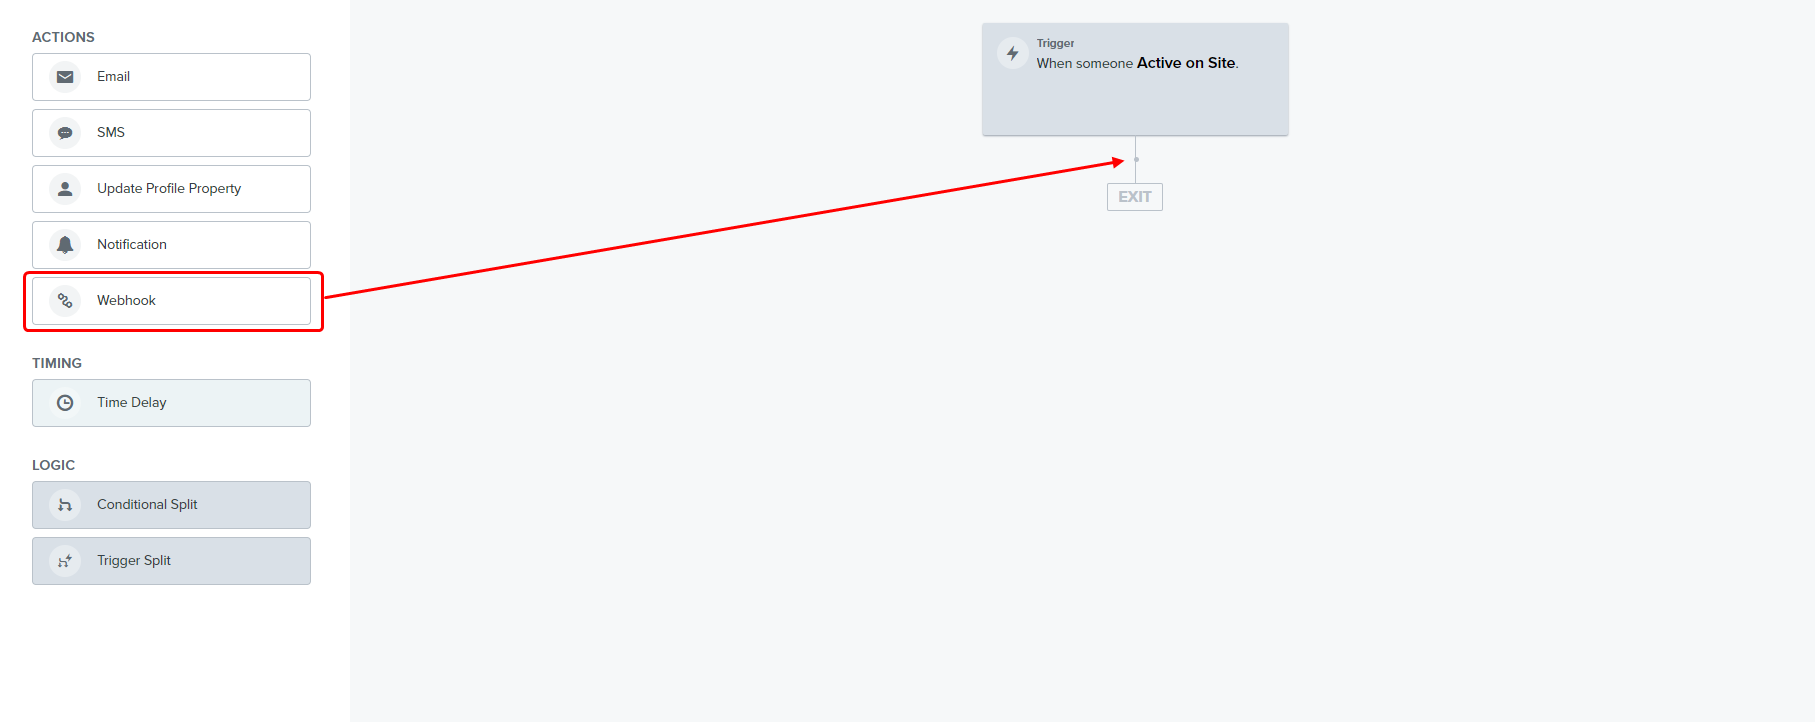
- Drag and drop webhook
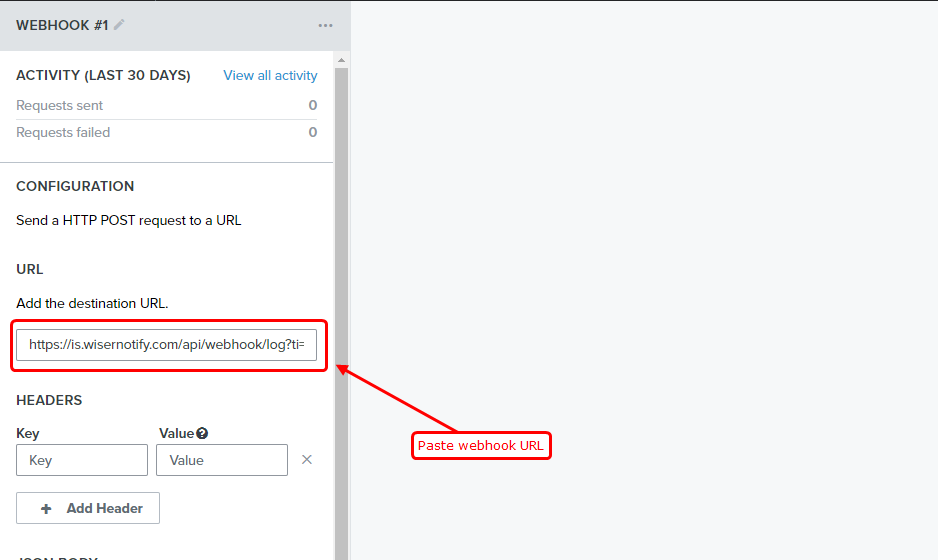
- Paste Wisernotify Webhook URL
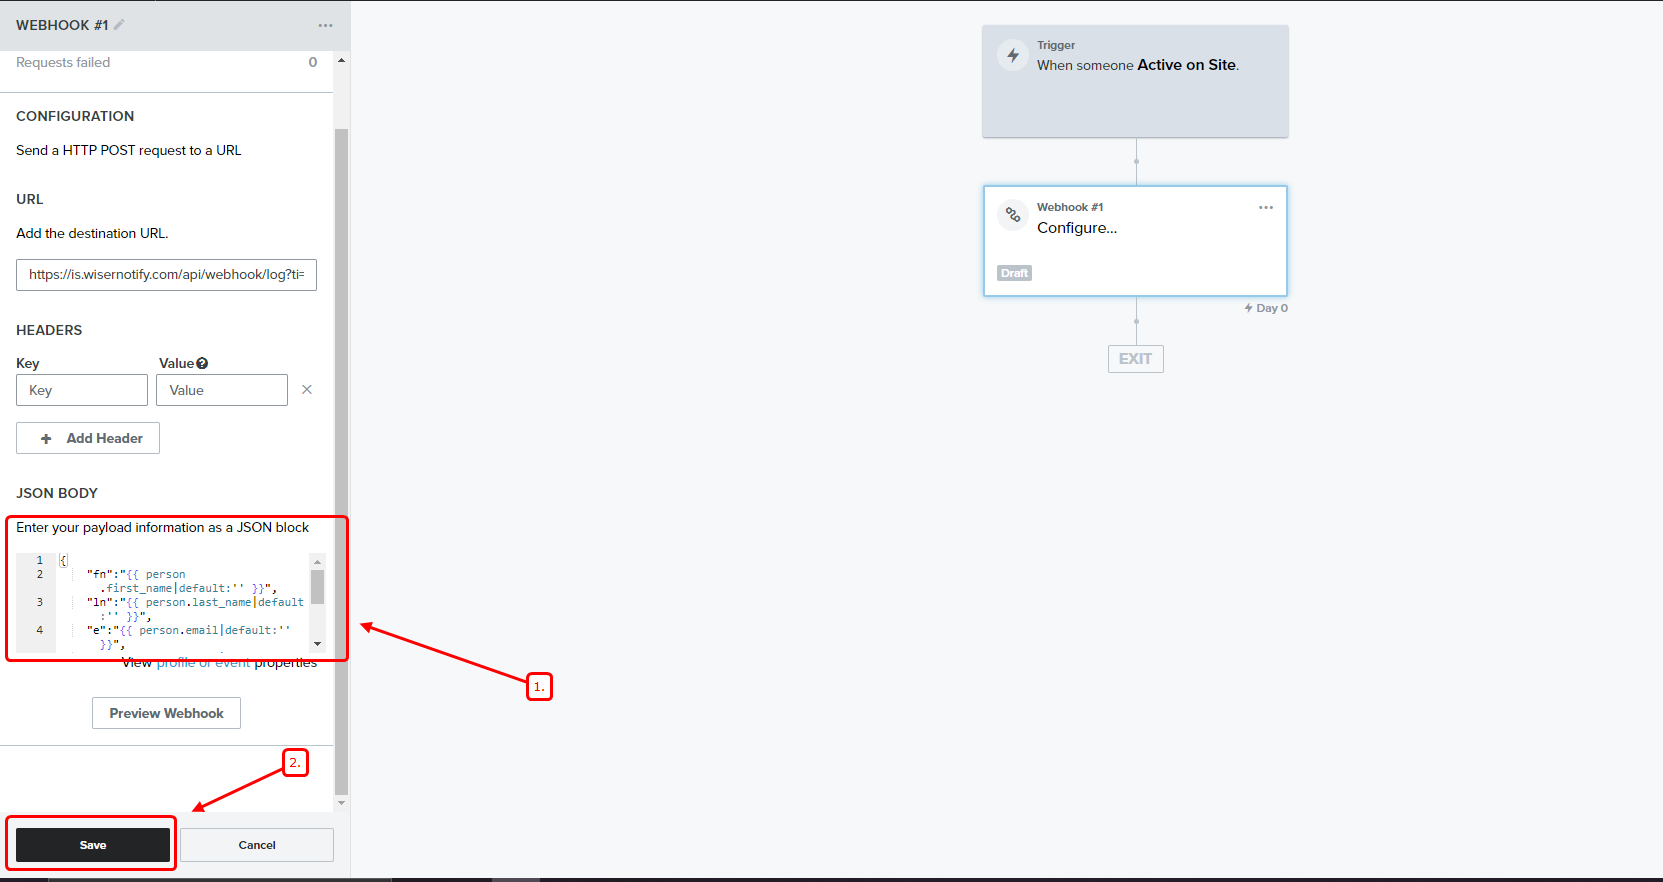
- Copy below JSON
{
"fn":"{{ person.first_name|default:'' }}",
"ln":"{{ person.last_name|default:'' }}",
"e":"{{ person.email|default:'' }}",
"ct":"{{ person.City|default:'' }}",
"st":"{{ person.Region|default:'' }}",
"cn":"{{ person.Country|default:'' }}"
}
- Paste into JSON Body and click on save
- Click on review and turn it ON
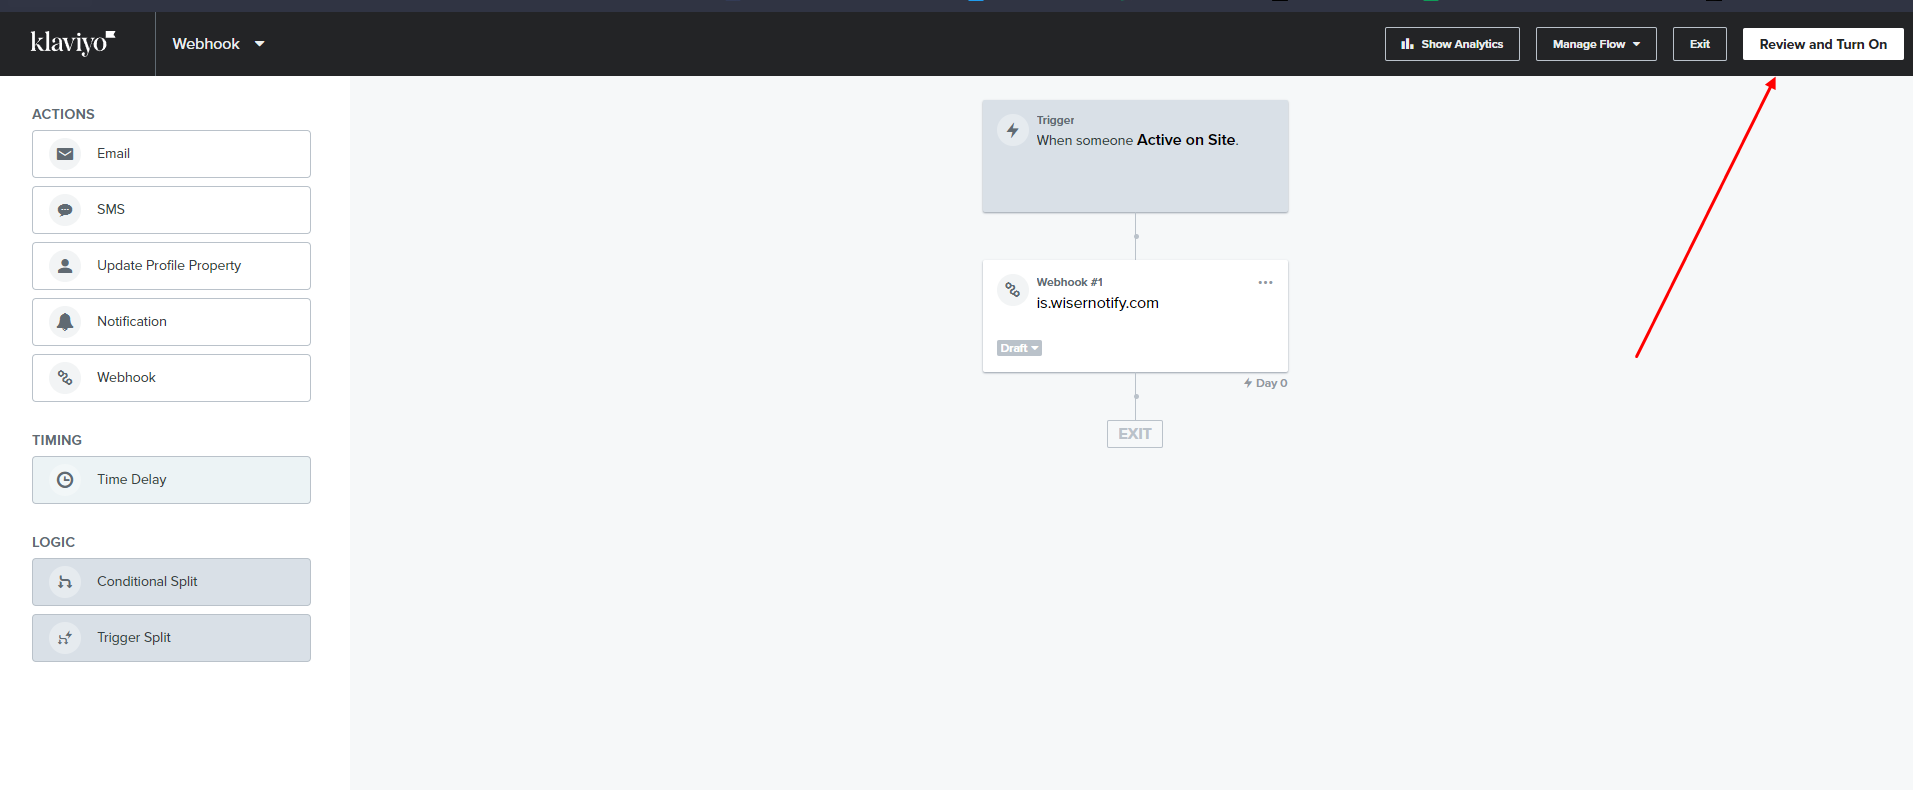
- Select action status Live and click on Turn ON

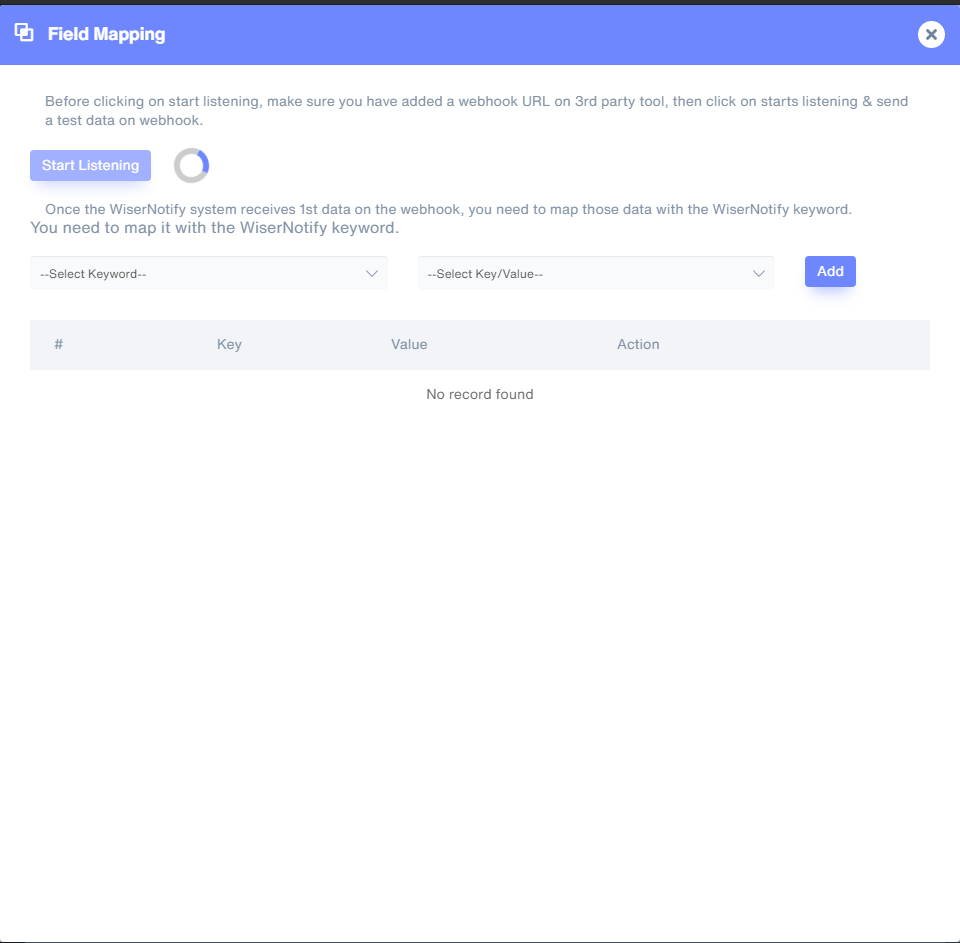
Now, Go back to the WiserNotify dashboard & Check the Custom webhook Integration popup ( Inside the mapping screen)
Once the JSON request is received successfully, you'll see this message.

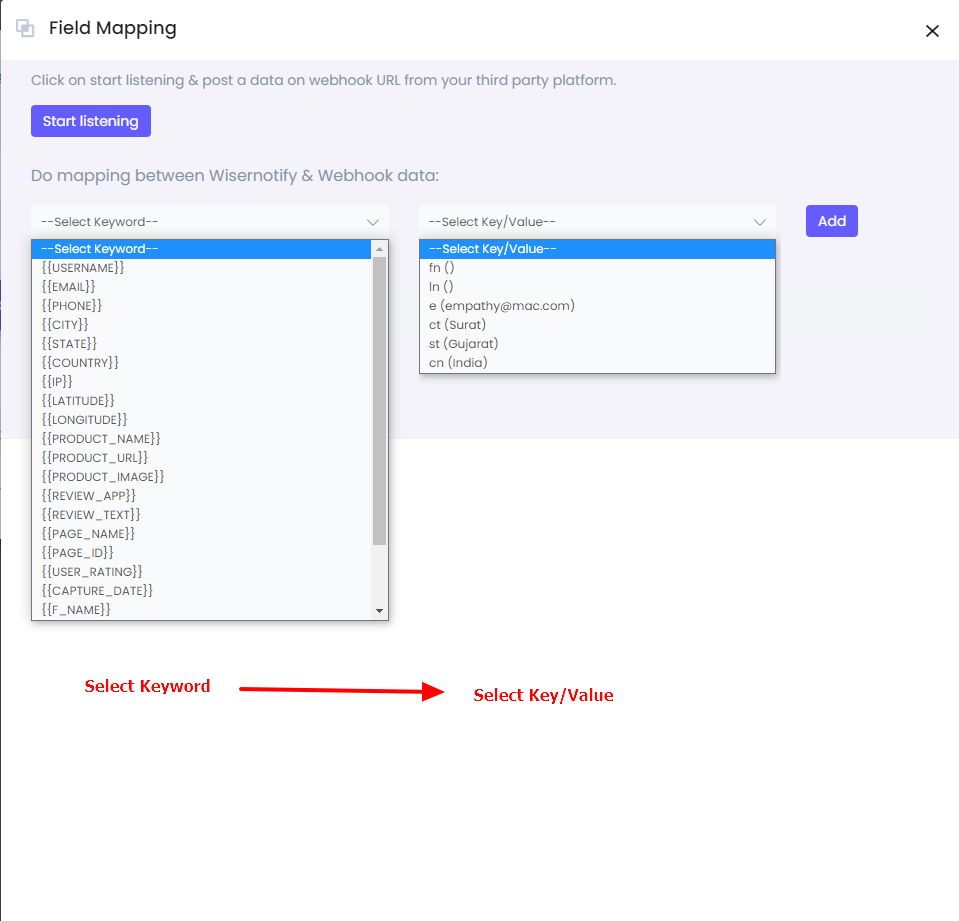
5. Now select Keyword and Select Key/Value & start adding one by one.
It's a one-time job, so take your time to get this done.
Once the mapping is done, enable this webhook into the notification data source section.
For more queries, reach us at [email protected] or our live chat support team. We would be happy to help you set this up.