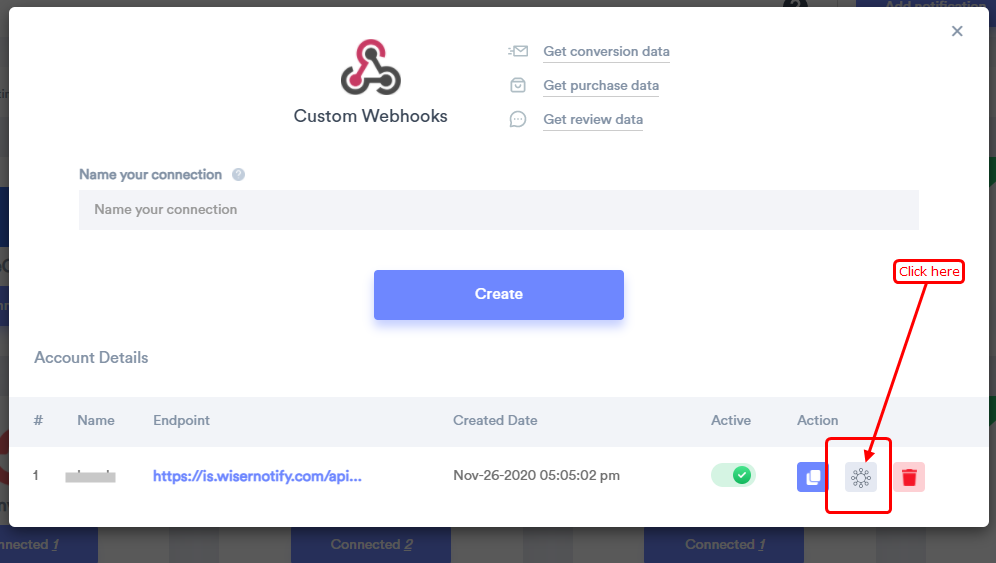
Step 1- Go to WiserNotify > Integration- Click on the Connect button in the Custom Webhooks box.

Step 2
- Enter the connection name.
- Copy webhook URL.

- Click on Mapping icon.


- Keep open this screen.

Step 3 - Here, We will set WiserNotify custom webhook URL in botstar account.
1. Login in Your BotStar account.2. Open your bot and go to Bot Builder option.
3. Create Variables In order to create a Variable, you should go to Data tab (on the left-hand side of Bot Builder), click the “+” Add Variables and fill in relevant information, then click Create. The new Variable will appear on the list under the Data panel.

For example, you want to make a “Name” variable:

Step 4
1. Here, you need to set these variable with the information that you are asking in your bot & save the collected information in the variable.
2. Go to Action Blocks and drag and drop the Update variables.

3. Click in the update variables block & Set the Action configuration.


Step 5
1. Now, let's send the data to WiserNotify.
2. Select in HTTP Action in Advanced Blocks.
3. Click on HTTP Action block.

4. Paste your WiserNotify webhook URL.
5. Create the data object & add JSON payload with Field name & Variable.

6. Select the POST method.
7. Add HTTP Headers.
Example:
{
"Content-Type":"application/json"
}

Now post the JSON data by running a Preview.
- Click on Preview button and complete the bot flow in preview mode.

4) Now, Go back to WiserNotify dashboard & Check Custom webhook Integration popup ( Inside mapping screen)
Once JSON request received successfully, It shows one message.

5. Now select Keyword and Select Key/Value & start adding one by one.
You need to do this mapping only for one time.

Once the mapping is done, enable this webhook into the notification data source section.
For more queries reach us at [email protected] or our live chat support team. We will help you in this integration process.
