Step 1
Login with Calendly
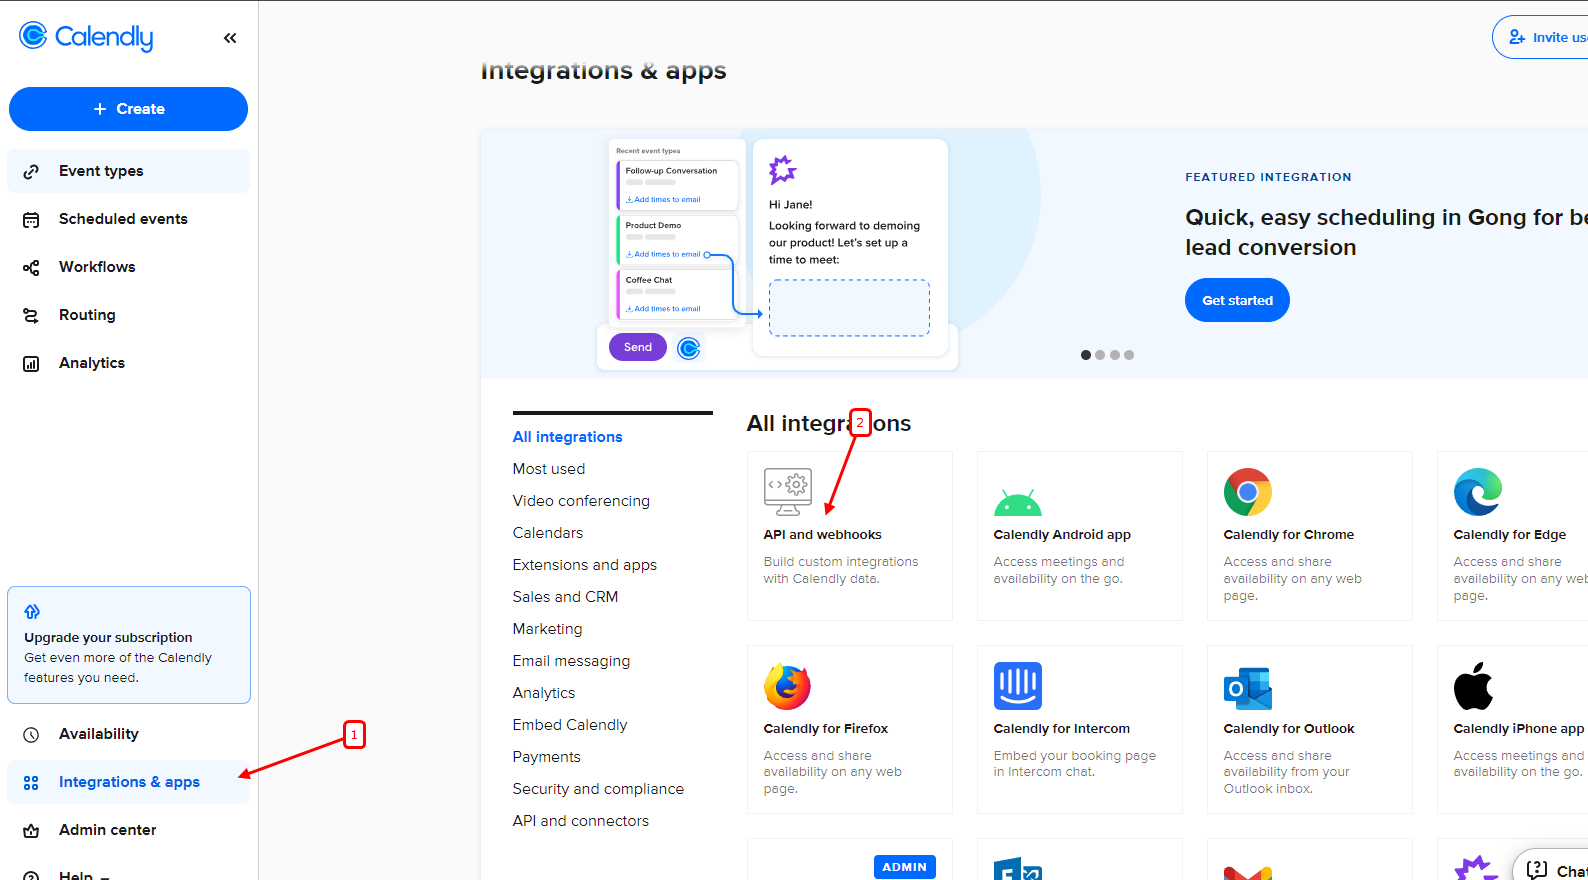
Click on the Integration tab inside the header.
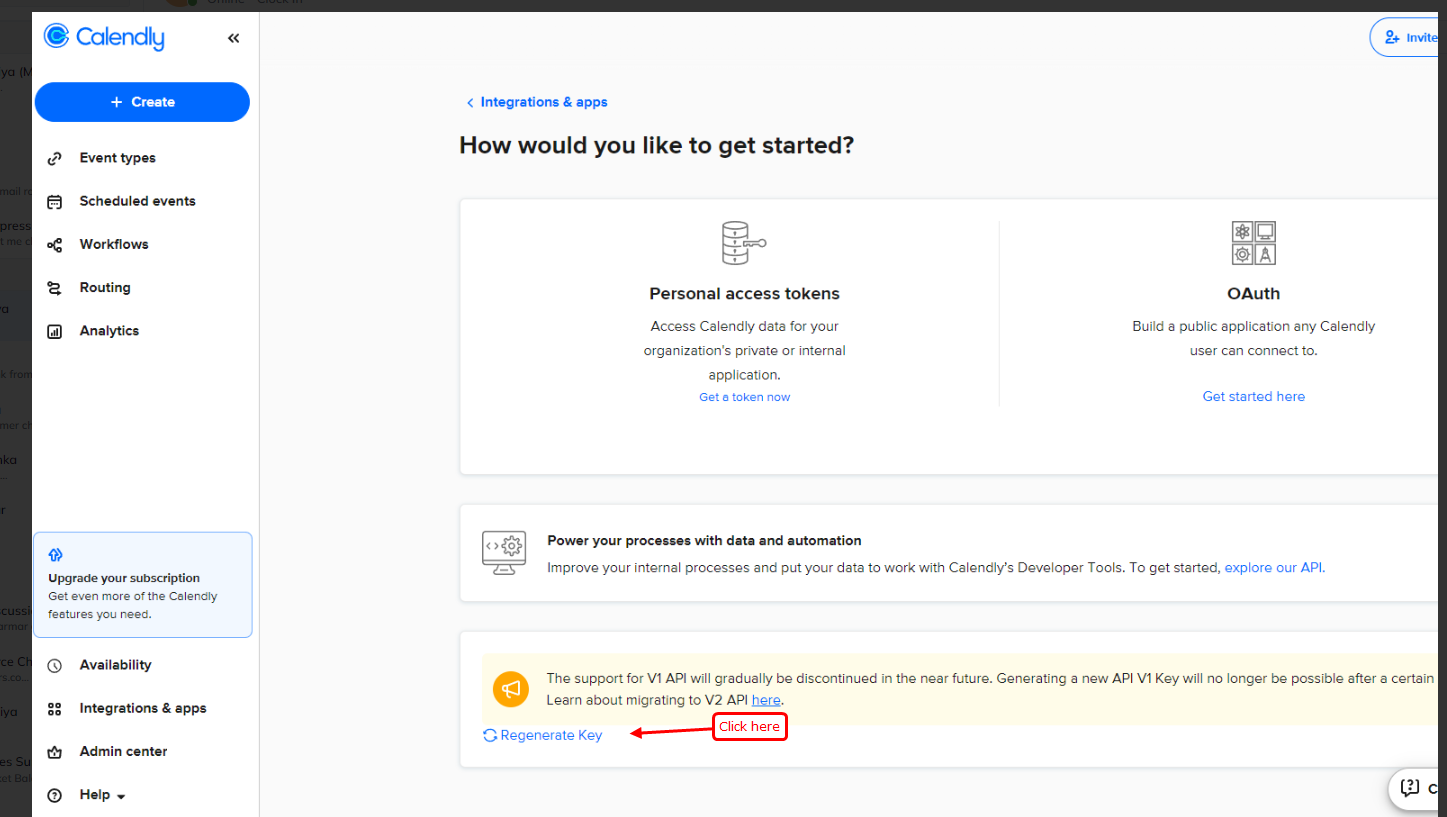
Step 2
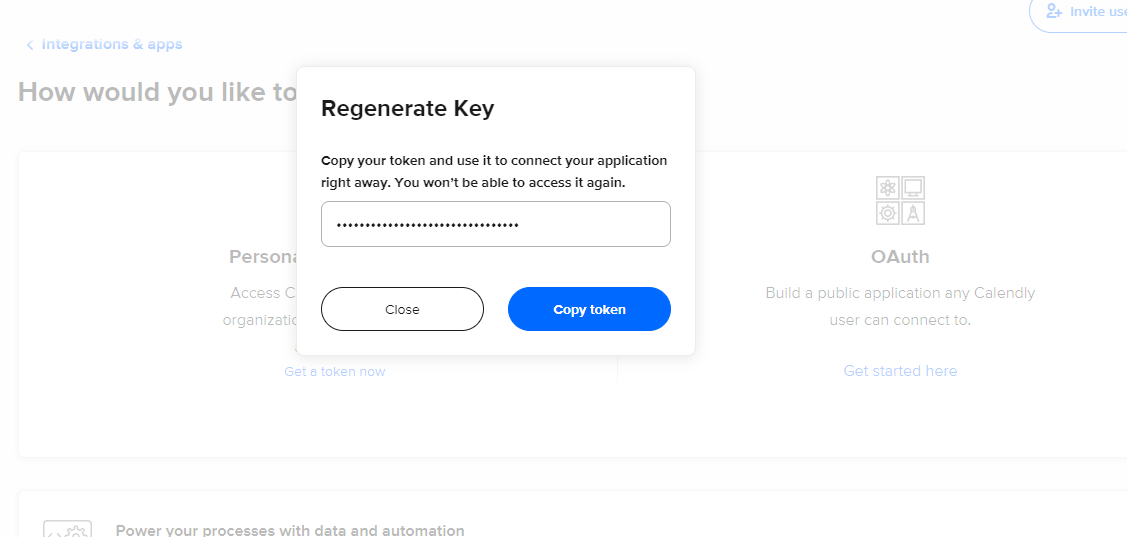
Click on Copy Token.
Step 3
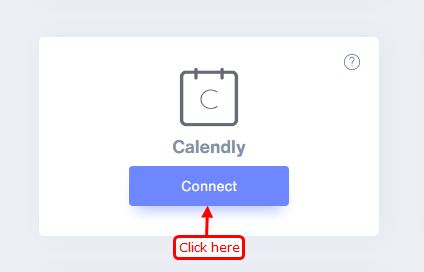
Now go to WiserNotify > Calendly Integration.
Click on the Connect button inside the Calendly box.
Step 4
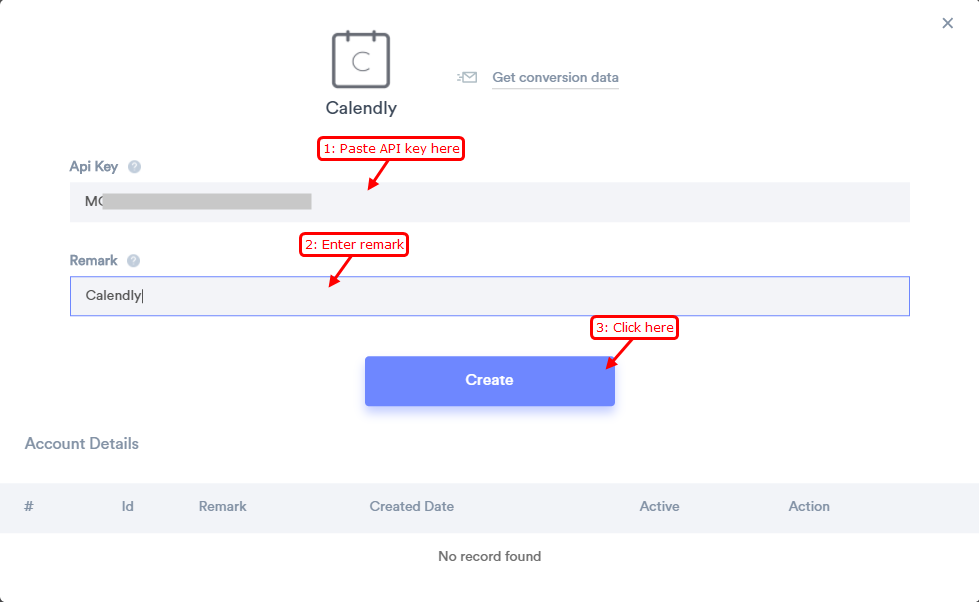
1. Enter API key.
2. Enter Remark.
3. Click on the Create button.
Please do the test by adding a new contact & visit the Data page. Here, You can see all the captured/ received data with its source name.
For more queries, reach us at [email protected] or chat with the support team. We will help you through the integration process.