Step 1
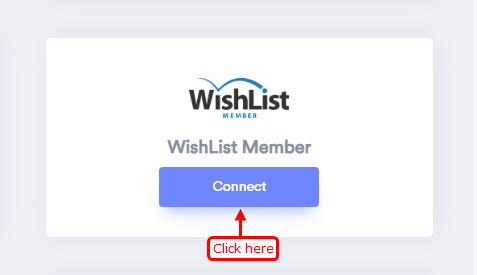
- Go to WiserNotify > WishList Member Integration.
- Click on the Connect button inside the WishList Member box.
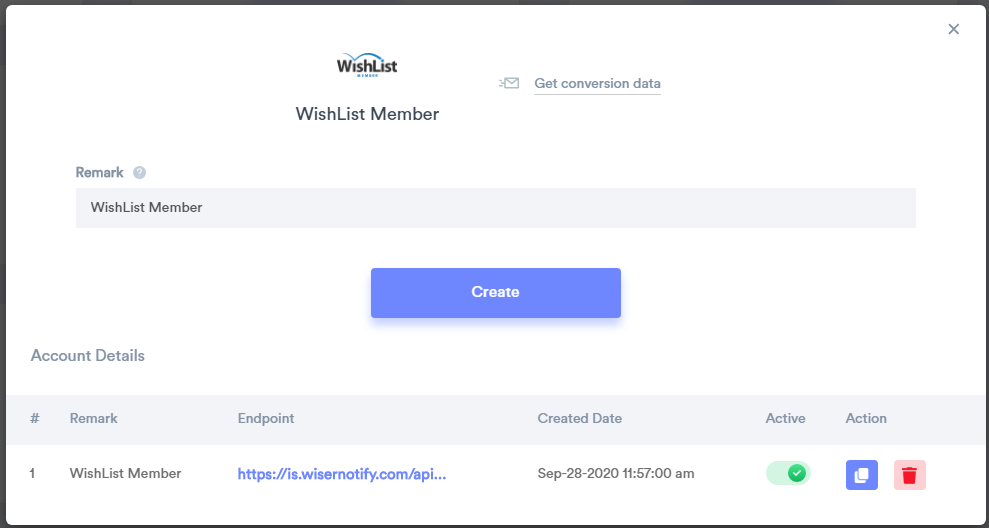
1. Enter Remark.
2. Click on the Create button.
3. Click on the copy button.
Step 2
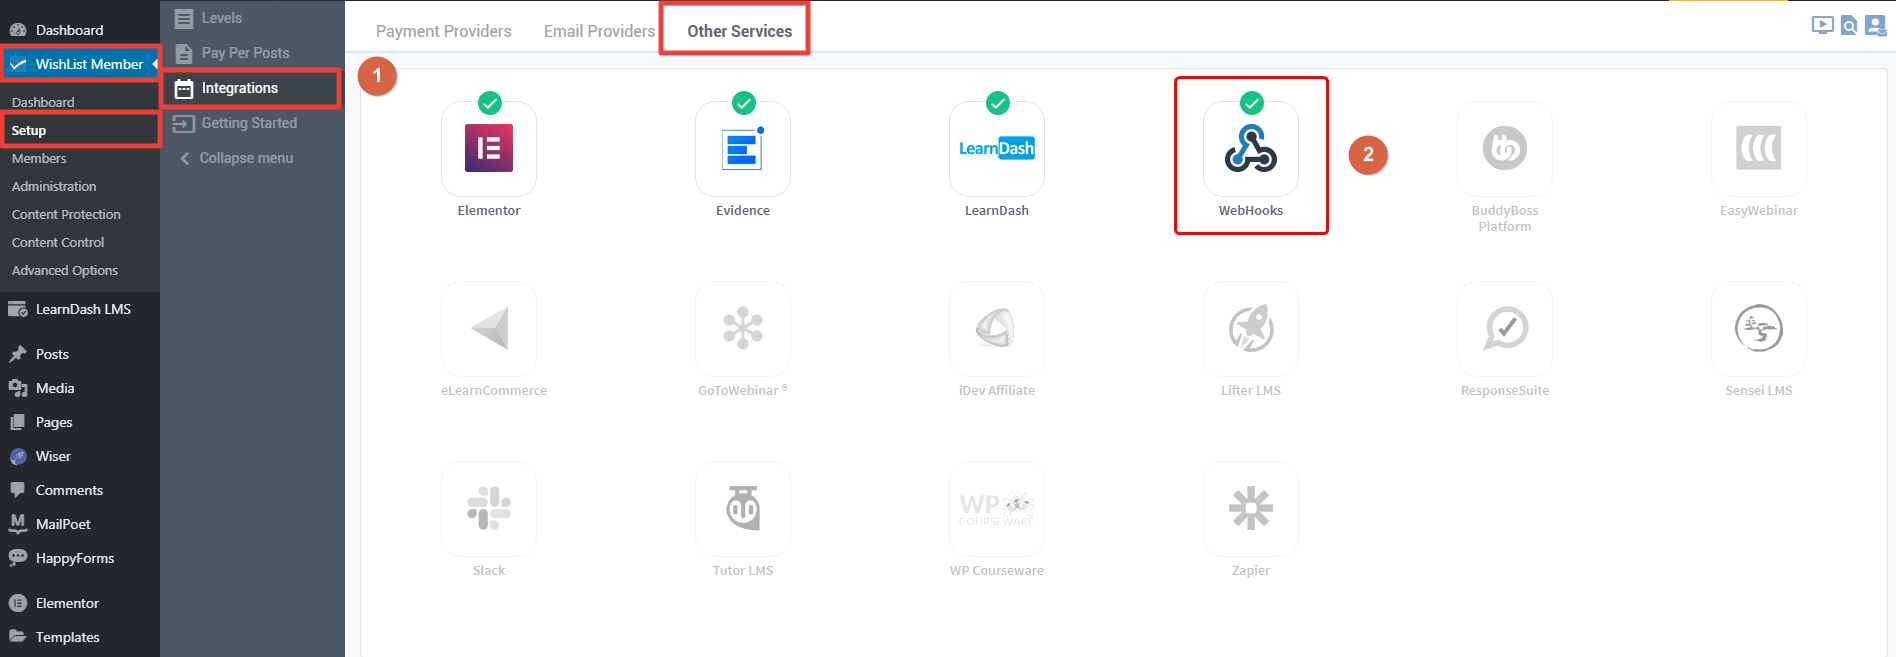
Login with WordPress and go to Wishlist member plugin.
1. Navigate to Setup > Integrations > Others Services.
2. Click on Webhooks box.
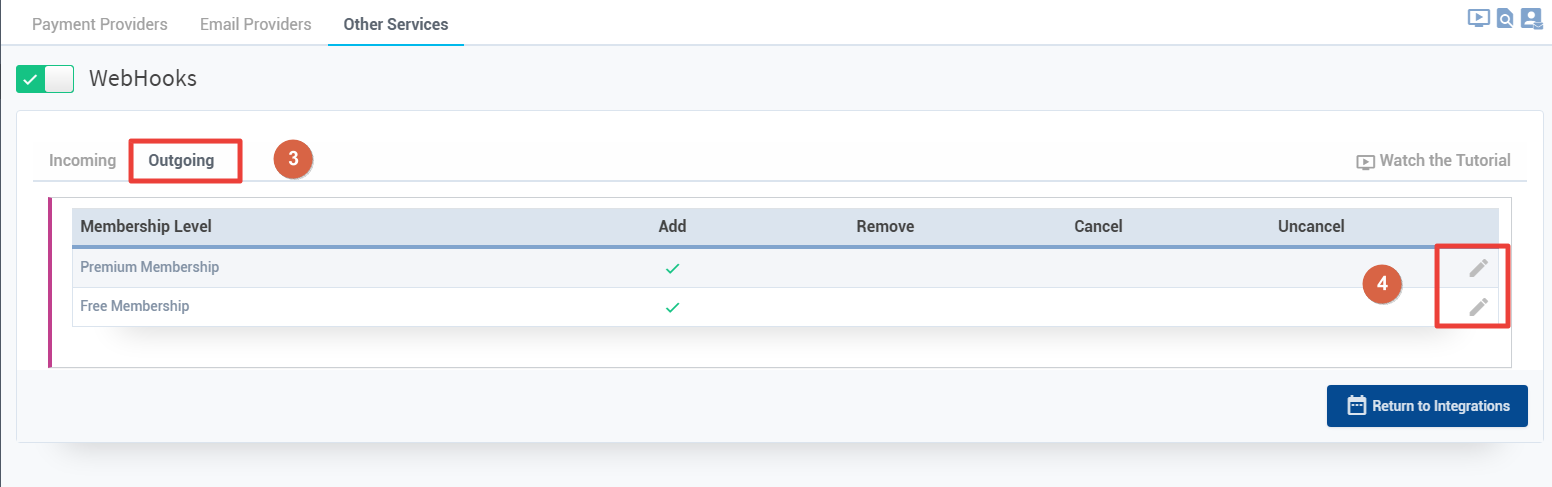
3. Navigate Outgoing tab.
4. If you can add webhook premium or free or both, click on the edit icon.
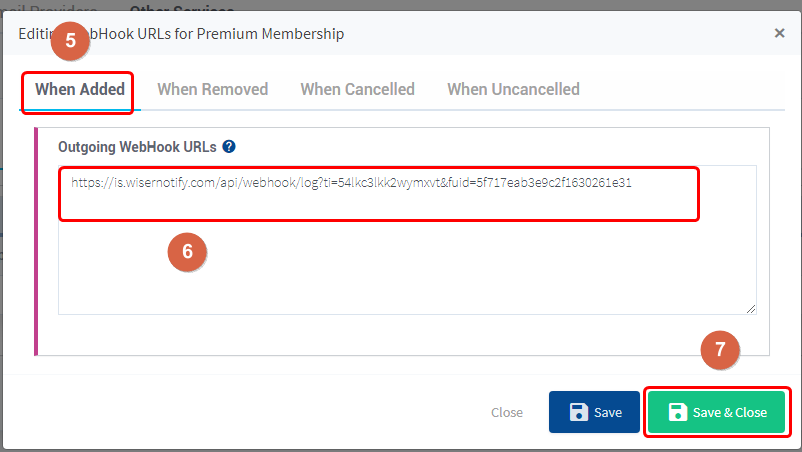
5. Navigate to When Added Tab.
6. Paste copied WiserNotify webhook URL.
7. Click on the Save & Close button.
Please test by adding a new data & visit the WiserNotify- Dashboard Data page. Here, You can see all the captured/ received data with its source name.
For more queries, reach us at [email protected] or chat with the support team. We will help you through integration process.