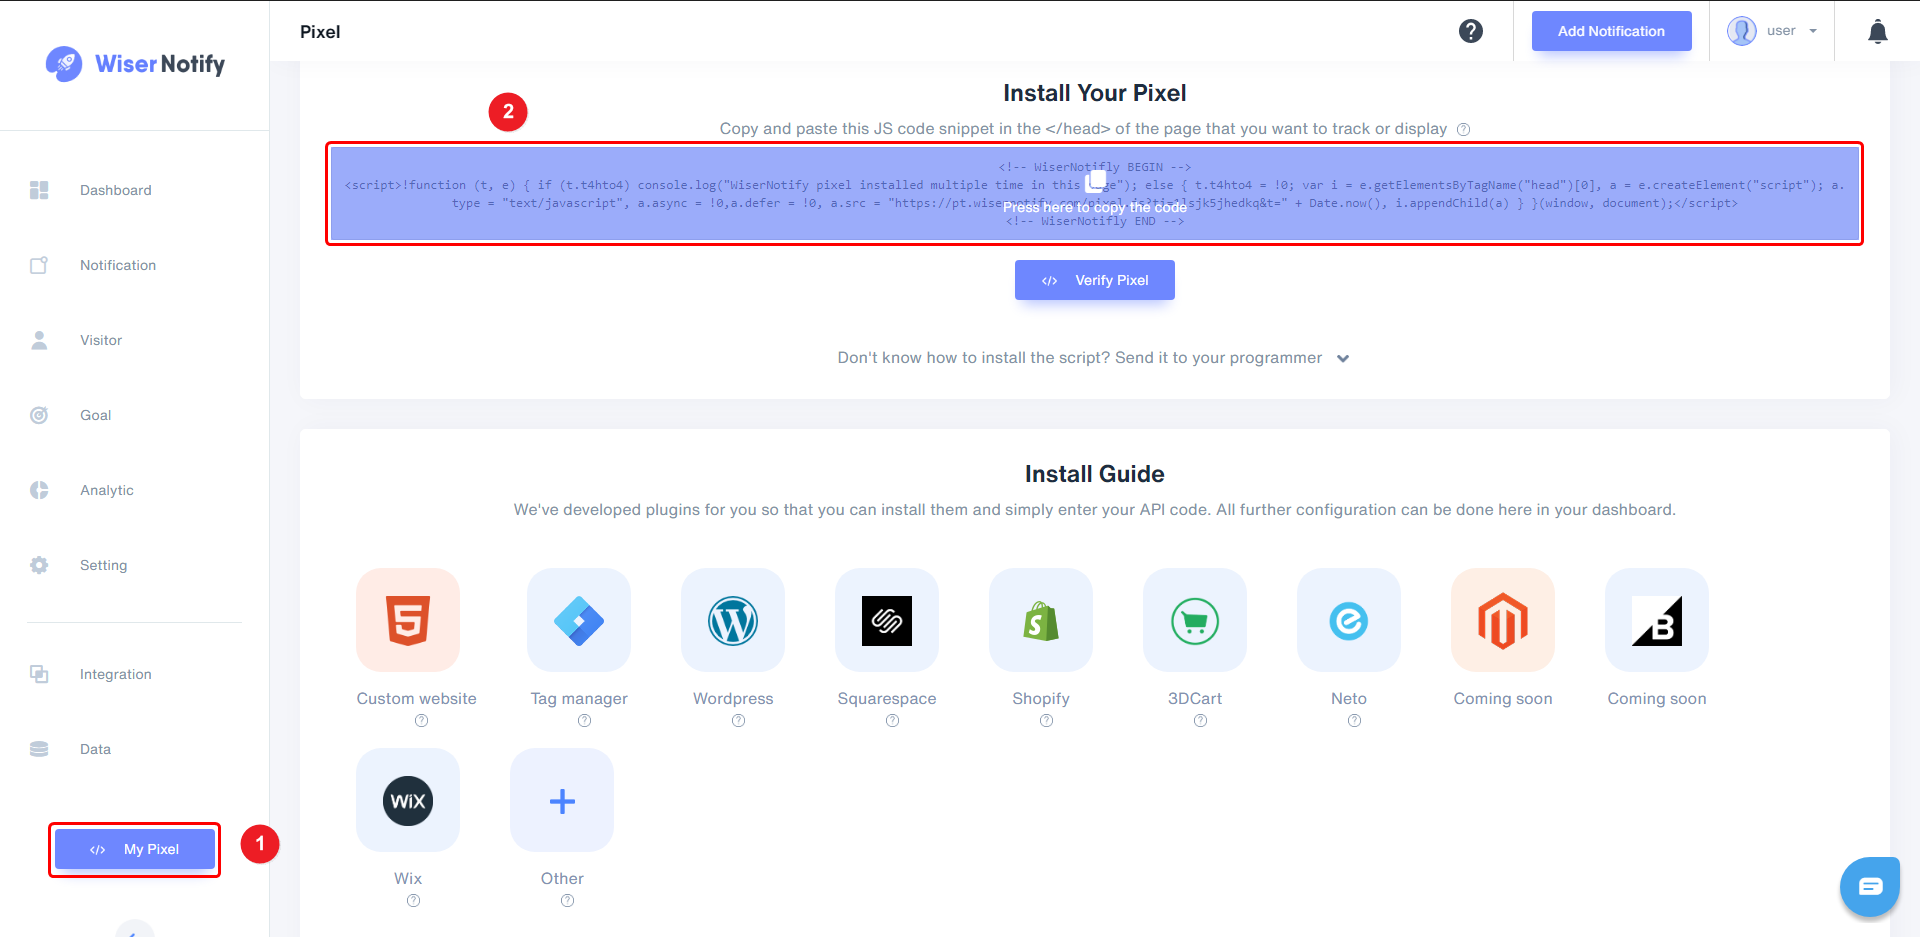
Step 1
1. Click on My Pixel button.
2. Click and copy the Pixel code from Install Your Pixel section.
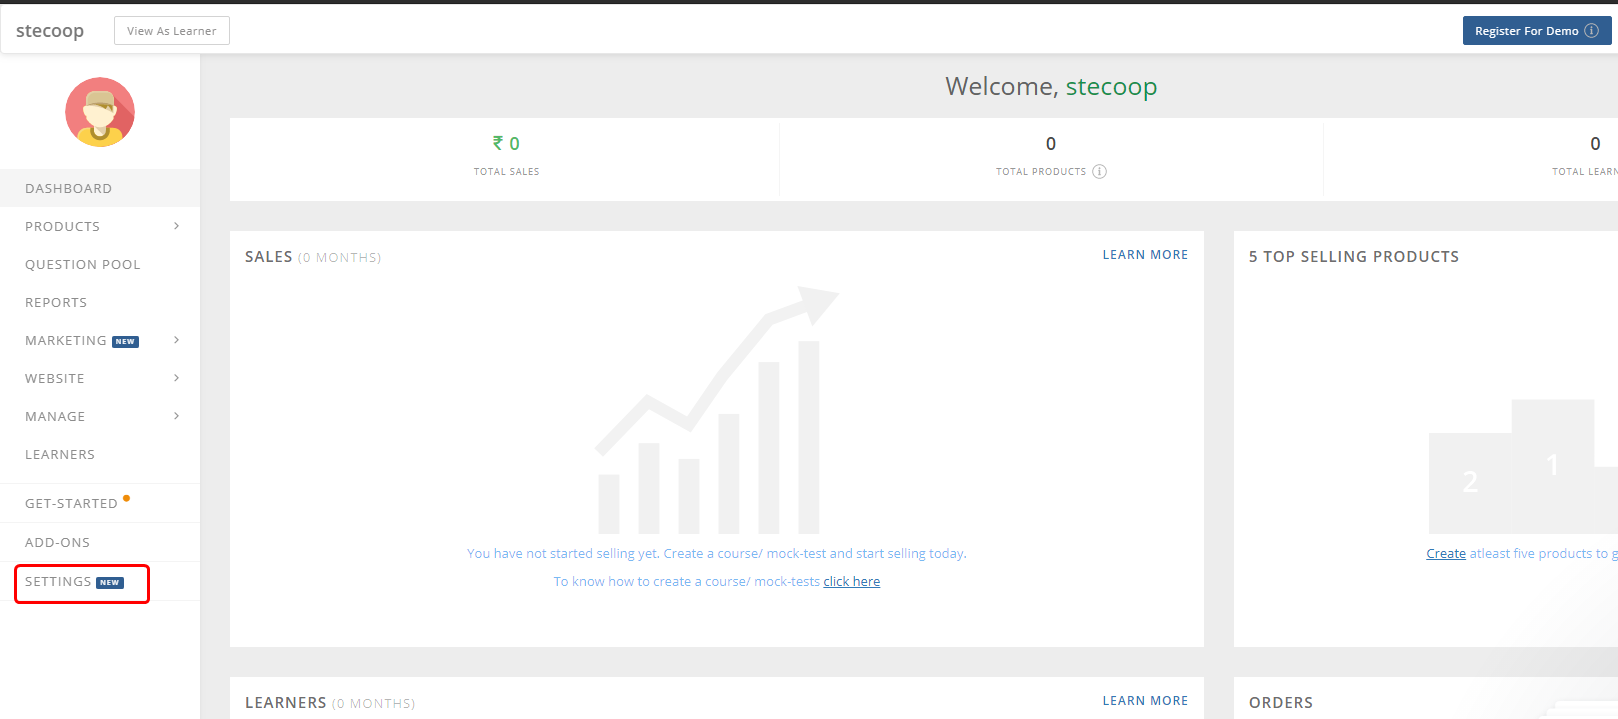
Step 2
- Click on SETTINGS.
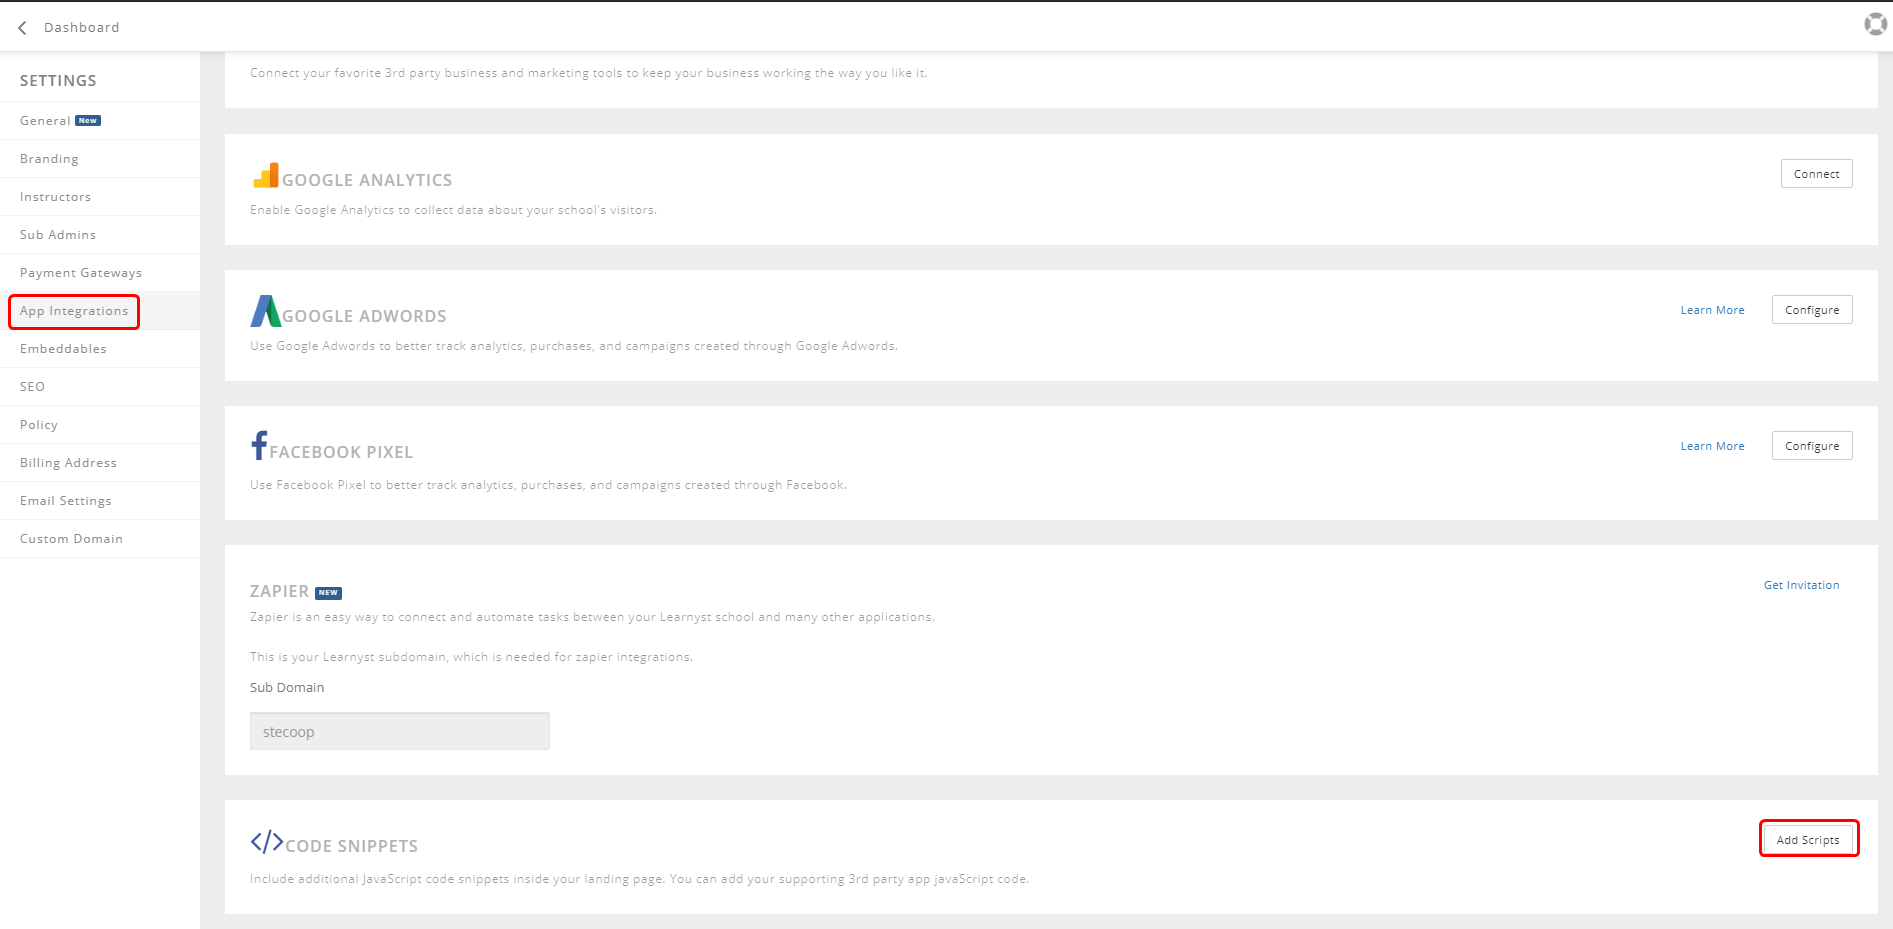
Step 3
1. Click on App Integrations.
2. Click on Add Scripts button inside CODE SNIPPETS section.
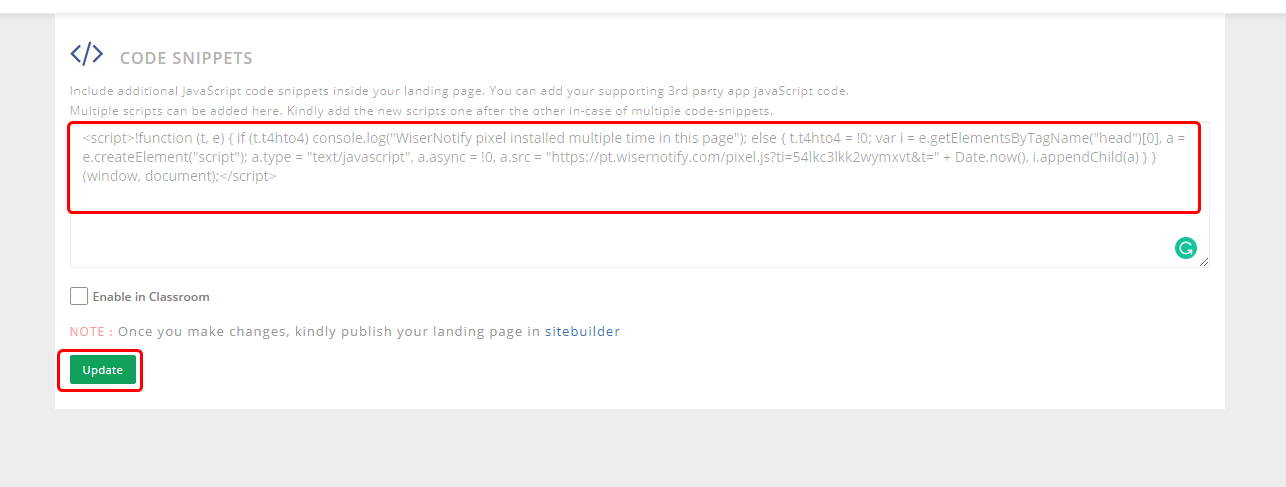
Step 4
1. Paste copied pixel code here.
2. Click on the Update button.
Note: This pixel script tag is required on every page wherever you want to track visitor activities, capture form submit events & display notifications.
Now, visit your site & reload or refresh it.
After that, return to WiserNotify panel & recheck the install pixel page & Wait for 5 seconds; it should show pixel detected popup. If not, then click on the verify my pixel button. It should display if installed correctly.
For more queries, reach us at [email protected] or our live chat support team if it is not working. We will help you through the process.