The experience of creating an online form has never been so fluent. The intuitive design of WP Fluent Forms puts all the tools right where you need them!
Step 1
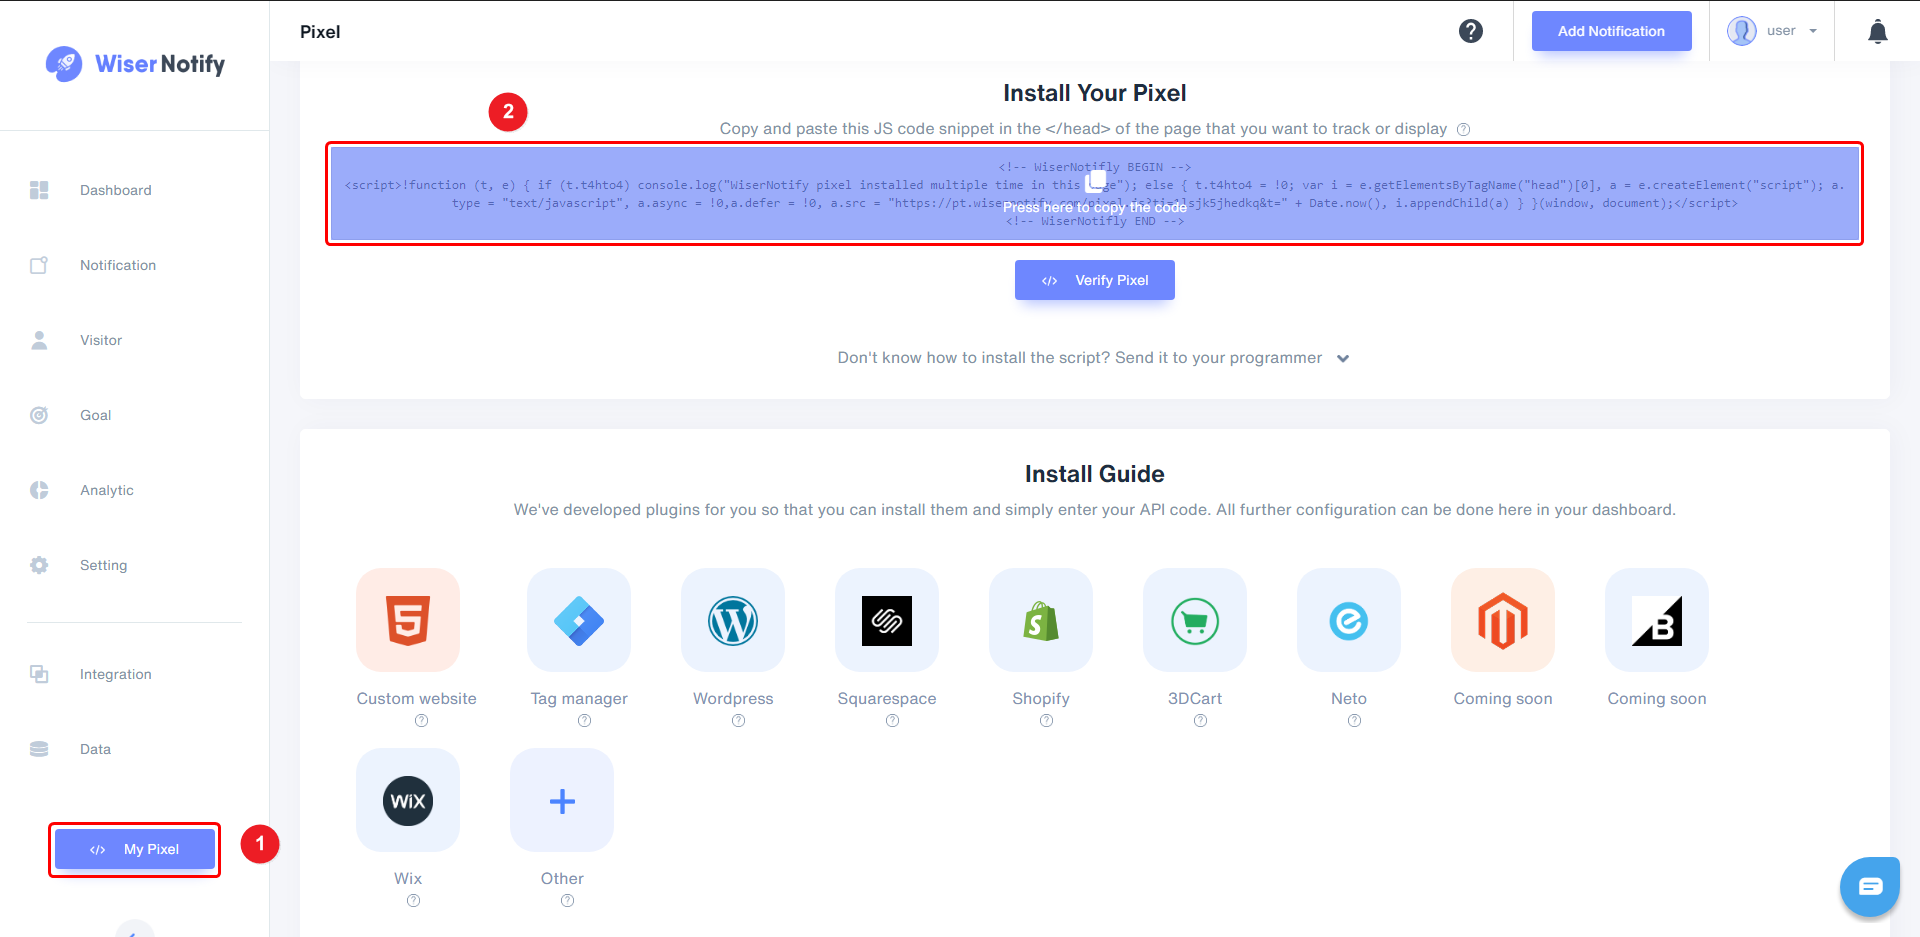
1. Click on My Pixel button.
2. Click and copy the Pixel code from Install Your Pixel section.

Step 2
Login with WordPress,
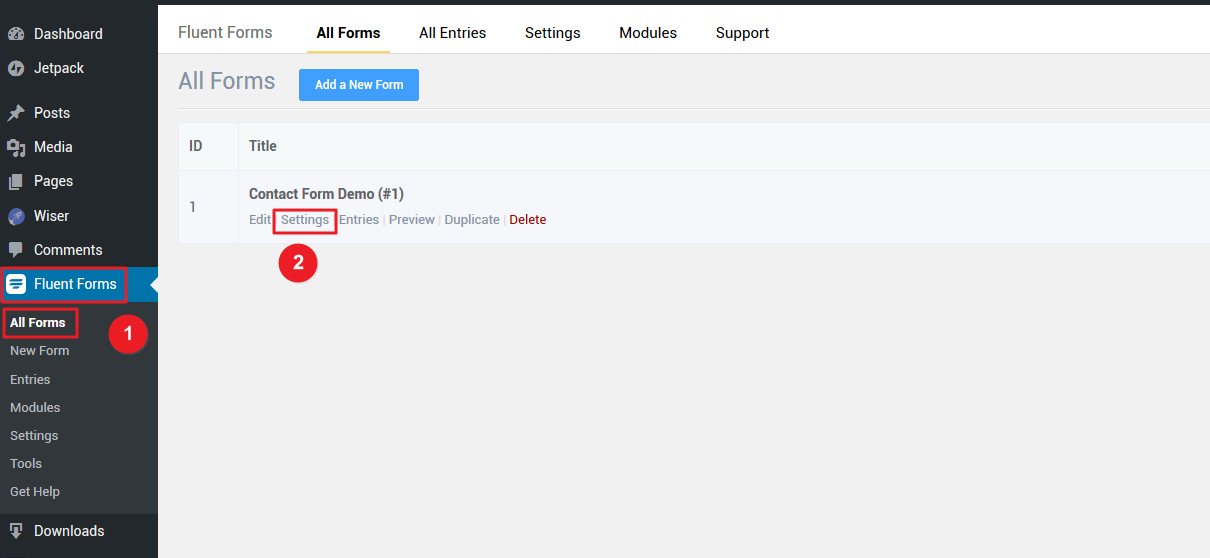
1. Navigate to Fluent Forms > All Forms.
2. Click on Settings in your Form.

3. Click on Custom CSS/JS.
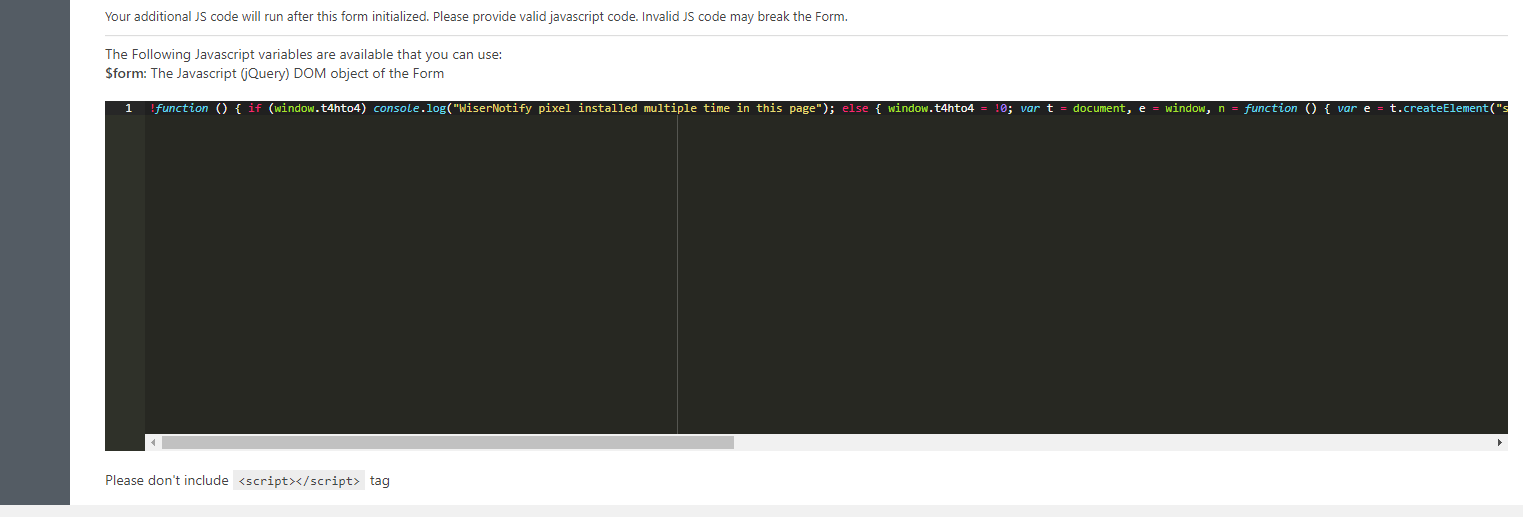
4. Paste WiserNotify Pixel code into Custom Javascript box.
Please remove below text from the script.
i) </p><p><br></p><p>ii)

5. Click on Save CSS and JS

Now, visit your site & reload or refresh it.
After that, return to WiserNotify panel & recheck the install pixel page & Wait for 5 seconds; it should show pixel detected popup. If not, then click on the verify my pixel button. It should display if installed correctly.
For more queries, reach us at [email protected] or our live chat support team. We will help you through the process.
