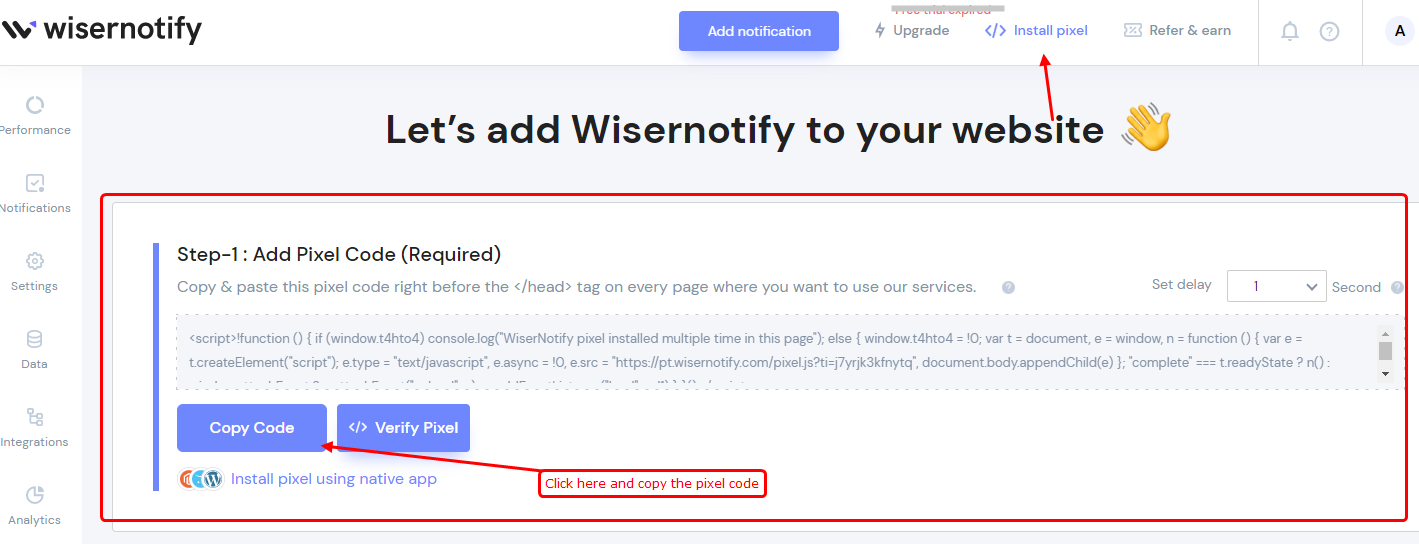
- Go to your install pixel page & copy the pixel code
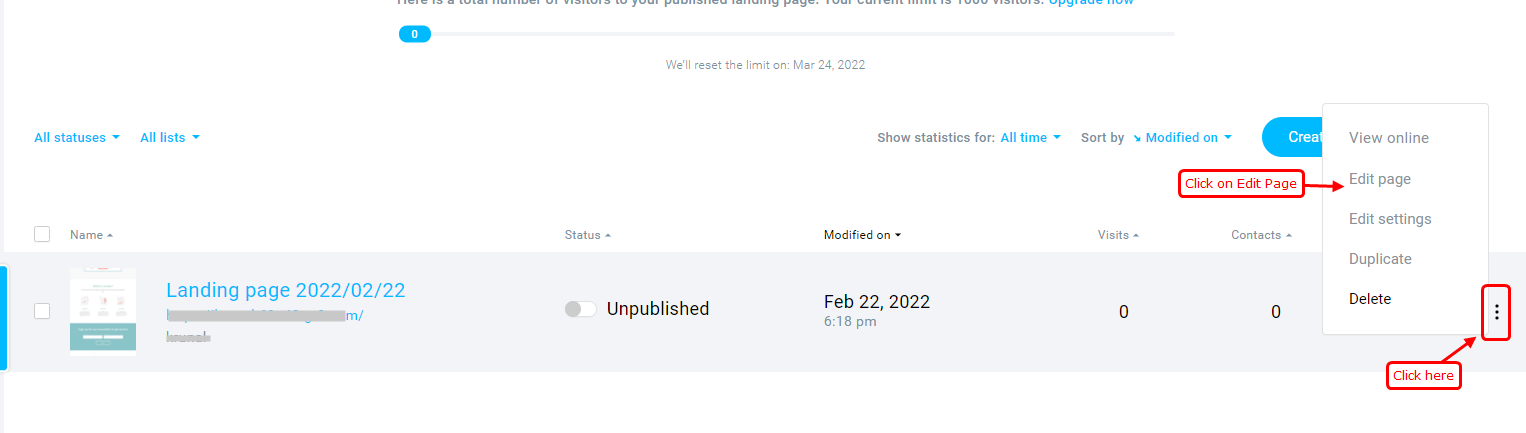
2. Go to your GetResponse account > Menu > Landing pages
3. Select Edit page from the Actions menu next to the page name.
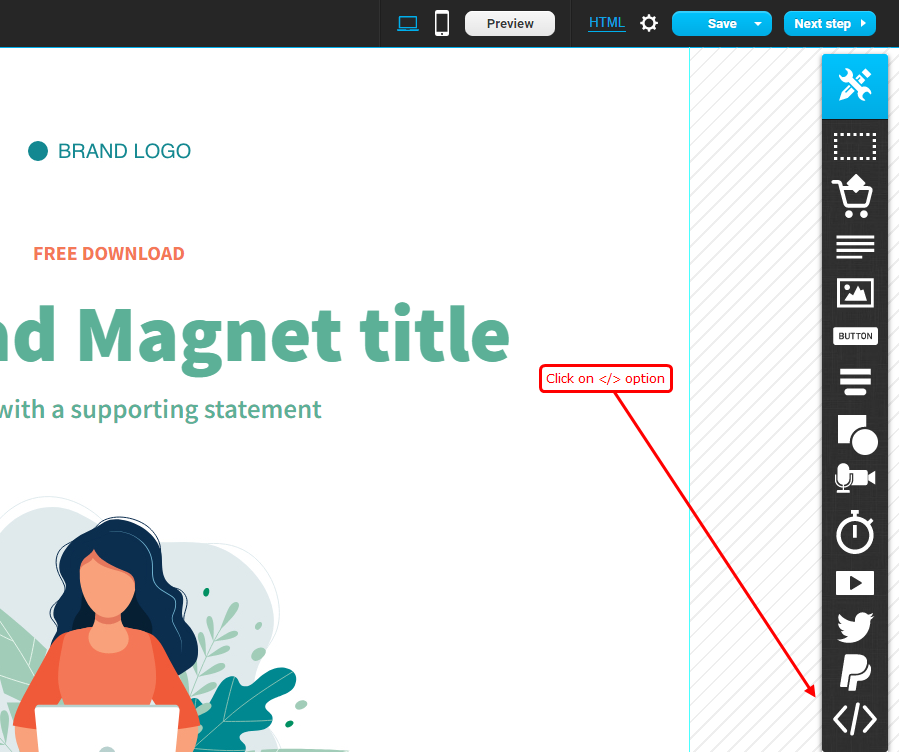
4. Double-click the Custom code </> icon ( right side bottom)
5. Paste your WiserNotify pixel code in the code
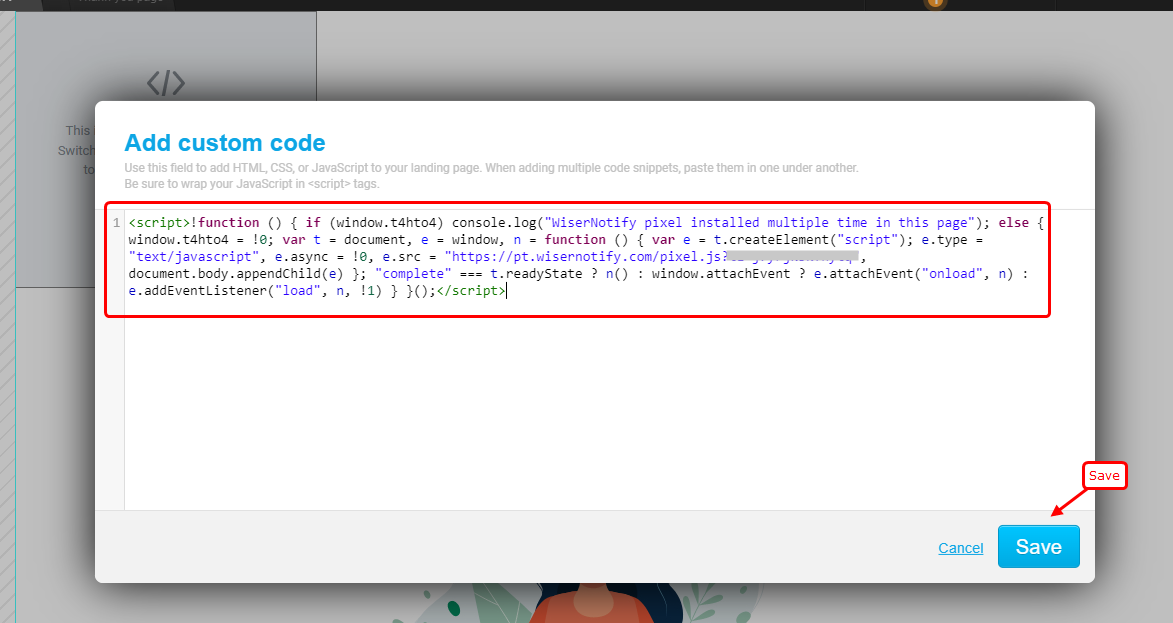
6. Save the changes or publish the landing page.
Now, visit your site & reload or refresh it.
After that, return to WiserNotify panel & recheck the install pixel page & Wait for 5 seconds; it should show pixel detected popup.
For more queries, reach us at [email protected] or our live chat support team. We will help you with this process.